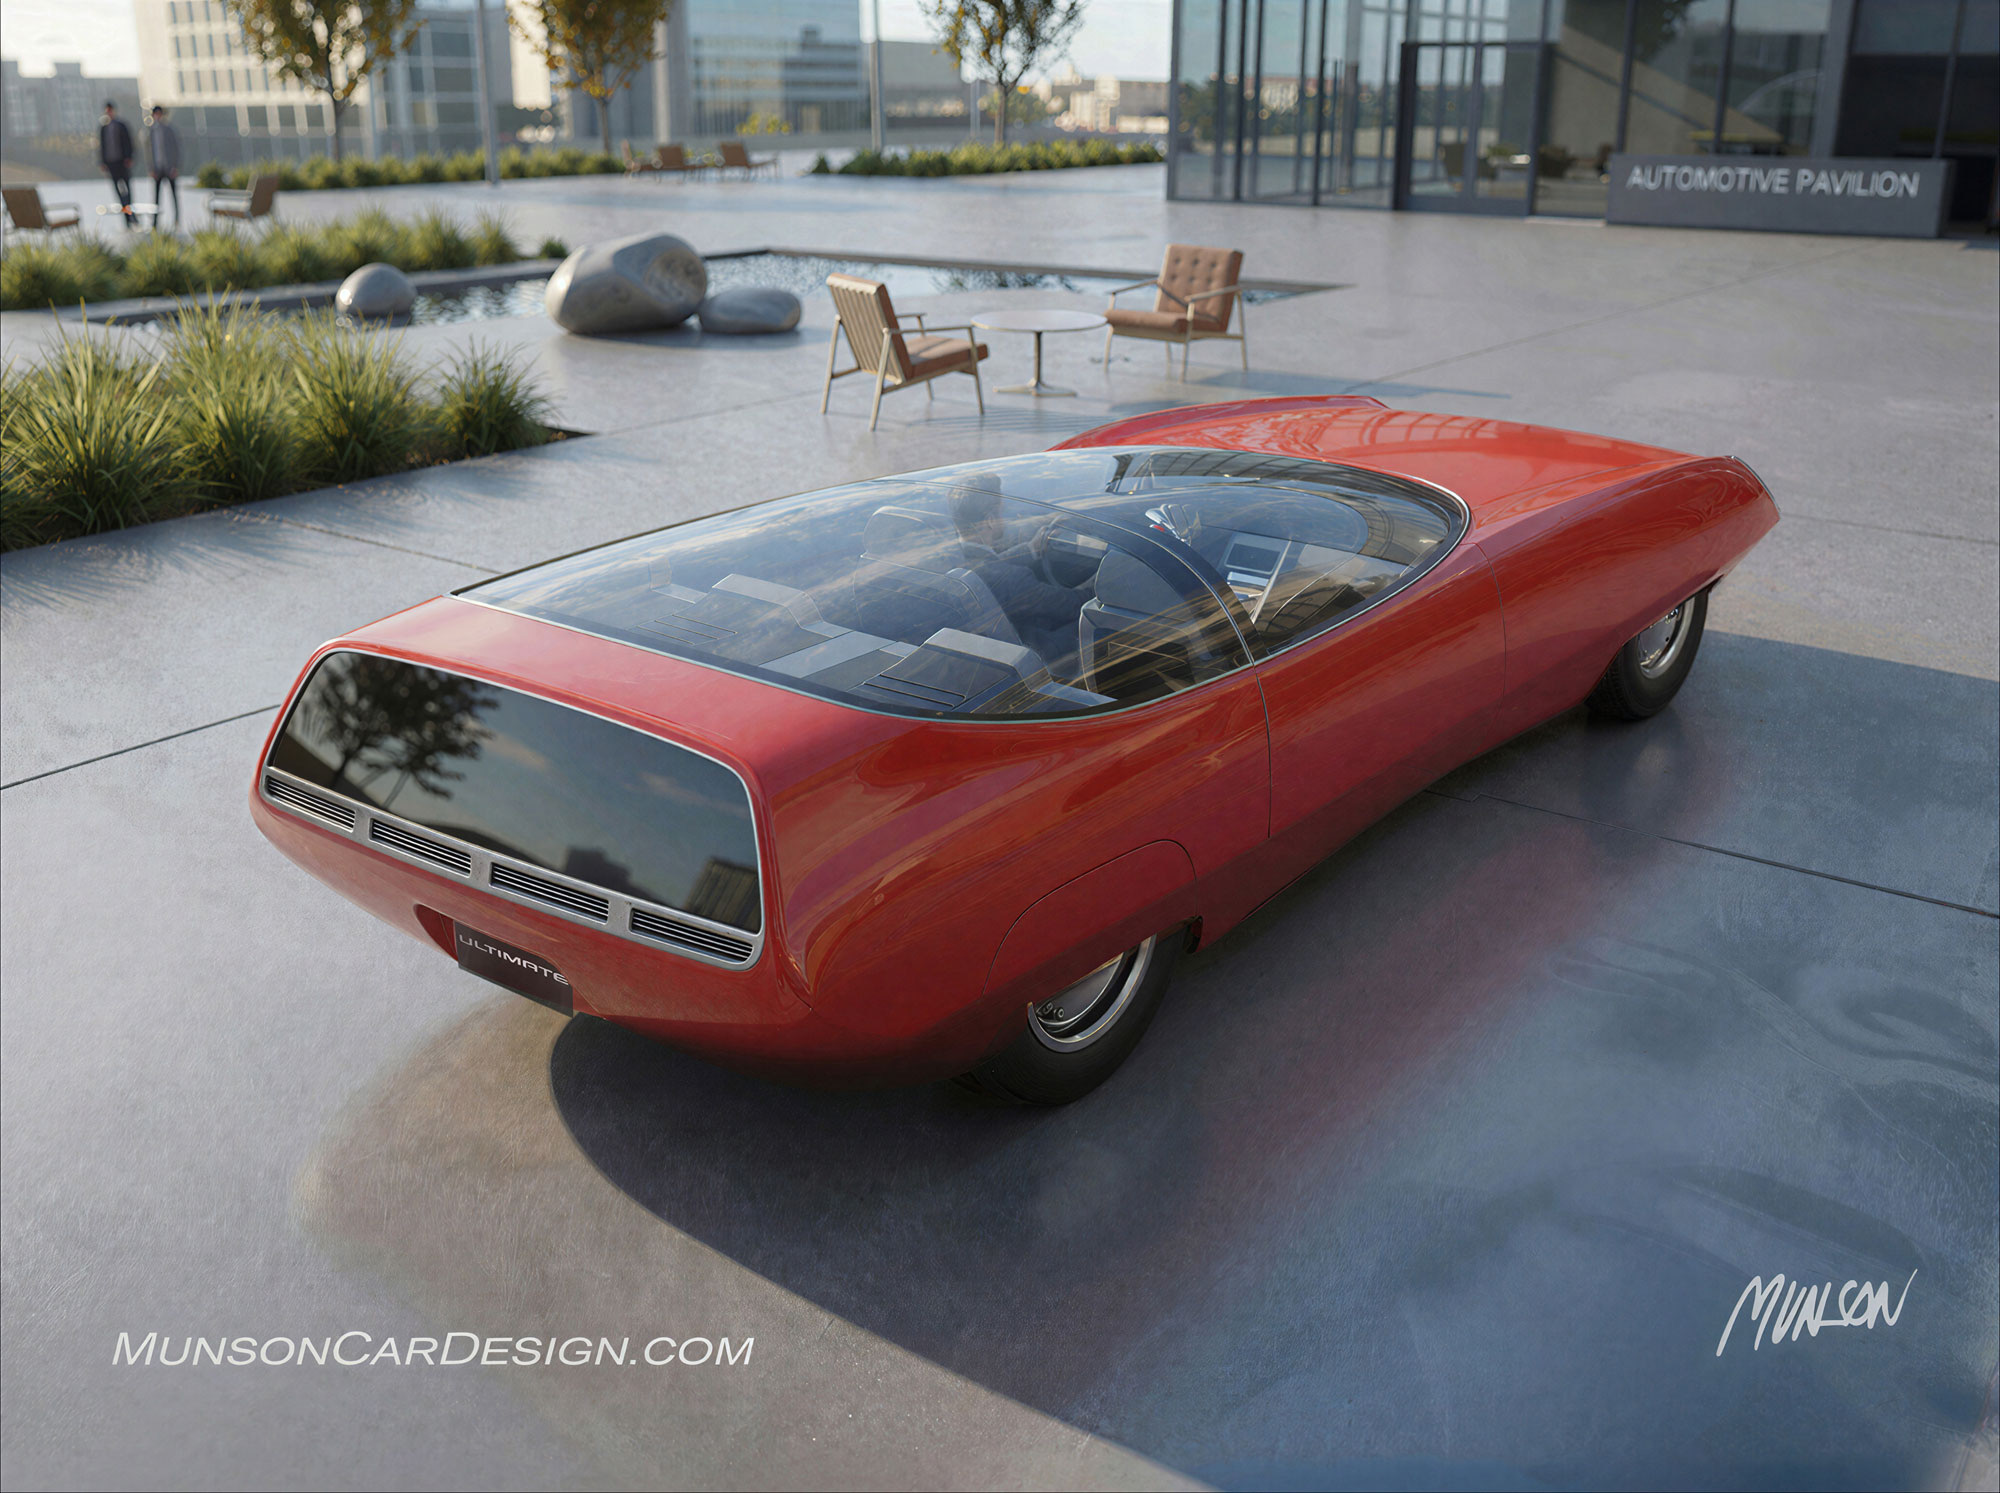
I’m taking a short break from our 3D printing discussion to focus on sketch quality, specifically how to make your designs more dramatic and visually compelling.
One of the best ways to elevate a sketch is to place it in an environment that enhances its character. I found a great background image online that had exactly the dramatic mood I was looking for. Even better, the composition perfectly framed the car. I can’t remember whether I found it on Pinterest or Behance, but both are excellent sources for inspirational imagery and reference material.
Combining Images in Vizcom Workbench
I uploaded the background image into Vizcom Workbench and selected Modify by right-clicking the plus sign on the right side of the image. Clicking on “Describe your changes” opens a prompt box with the image already loaded.
Next, I uploaded one of my favorite sketches into Workbench. I clicked the plus sign on the right side of that sketch and dragged the arrow to the same Modify prompt box. The second image then appeared alongside the first. You can add up to four images to a single prompt.
For my prompt, I wrote:
“Take the car with the rear 3/4 view from image 2 and place it into the background of image 1.”
I specifically called out the view I wanted because Vizcom has a tendency to interpret your request creatively and sometimes generates a different design or viewing angle. Being specific helps keep the original design intent intact.
Taking Your Sketch a Step Further with Animate
Once I had a result I liked, I continued developing the sketch using Vizcom’s Animate feature. You’ll find it just below Modify when you click the plus sign on the right side of your image in Workbench.
I particularly like using Animate to explore alternative views of my designs. The resulting videos often reveal interesting angles and compositions that I might not have considered. I can then screen-capture those frames and bring them into Photoshop for further development.
When AI Doesn’t Quite Understand Your Design Intent
I ran into an interesting challenge when trying to get Vizcom to understand how I wanted the doors to open in the animation.
My intention was to have the lower portion of the door swing upward, Lamborghini-style, while the roof section and side glass opened gullwing-style. Vizcom repeatedly insisted on attaching the side glass to the door rather than treating them as separate moving components.
My workaround was to capture a still frame from the video and render a new sketch showing the doors open exactly as I envisioned them.
I then returned to Animate and added two reference sketches using the same process described earlier: my original sketch with the doors closed and the newly created sketch showing them open.
One design detail you might notice: How would the door swing forward with that rear cut line? It would actually have to swing outward first and then upward.
Sometimes getting the result you want means working around the AI rather than continuing to fight with it!
The Results
The results speak for themselves. Vizcom gave the sketches a much more dramatic presentation and helped bring the design to life in ways that would have taken considerably longer using traditional methods alone.
That said, the process isn’t completely hands-off. I still needed to clean up the images and make some proportional adjustments in Photoshop Elements. Think of Vizcom as another tool in your design process, not necessarily a replacement for your own drawing and Photoshop skills.
New to Vizcom? Here’s Where to Start.
If you’re new to Vizcom, this is a great way to breathe life into sketches you’ve created on vellum or bond paper. You don’t need to start with a sophisticated digital drawing. A good traditional sketch can be an excellent starting point.
You can get started for free by registering online at Vizcom. There are also some excellent tutorials available through Vizcom University to help you become familiar with the platform.
I’ve included two particularly useful introductory videos:
- Creating Your Account
- Creative Interface
They’re a good starting point if you haven’t explored Vizcom yet.
One Last Tip: Build Your Reference Library!
I always save interesting reference images as I come across them, adding them to a dedicated folder on my phone for future use. I’m constantly finding images that inspire a particular mood, lighting effect, composition, vehicle detail, or design direction.
I literally have hundreds of them!
You never know when one of those images will become the perfect reference for a future project. Start collecting them now. You’ll be glad you did.
Happy sketching!